
Let’s face it—it is very easy to sound bad on the violin, and it is very hard to sound good! Of all the dozens of elements you could work on to improve your violin playing, the one thing that will give you the best return for your invested effort is a four lettered word—TONE.
What the…? Everyone knows TONE is what primarily makes us sound good or bad, and separates the pros from the amateurs. Well, intonation is pretty critical too, but that will be discussed in another post. So if everyone knows tone is important, why aren’t teachers paying more attention to it?
I believe that TONE has been over-mystified. It has become a “Holy Grail” or secret elixir. It starts to feel like only the elite few can attain it, or only those who get an expensive enough violin. Or an old enough violin. Or how about a teacher who pays attention to it?!
Well, I am here to tell you the truth: good tone can be achieved by anyone on almost any violin. All it takes is the willingness to pay attention to three fundamental ingredients in what I have come to call the “TONE PIE”.
Tone Production, Simplified
Tone on the violin consists of three basic ingredients. I’ll tell you what they are in a minute. You can adjust your tone by changing the amounts of each ingredient—but if you reduce one ingredient, you have to make up for it by adding more of another ingredient.
For example, if you have 1/3 cup flour, 1/3 cup sugar, and 1/3 cup water, you will have a total of 1 whole cup of pie. Suppose your pie is way too sweet. You would reduce the sugar, right? Maybe only 1/8 cup of sugar. So the rule I gave you would require you to add more flour, or water, or a little of both to make up for the sugar you removed. (and usually, you’ll add a little of each one) If your pie is too dry, less flour and more water. How simple is that?!
Are you biting at the bit, wondering how long I’ll string you along before I give you the 3 ingredients? Oh heck, I’m no good at that game, so here you go: The 3 basic ingredients of tone are:
- Bow Weight
- Bow Speed
- Bow Placement
Each of these ingredients accounts for 30 percent of your tone, for a total of 90 percent. The other ten percent comes from more subtle nuances of bow control and of left hand technique. I don’t count the instrument as an ingredient. Obviously, you want the best violin you can afford, but I want to teach you how to sound your BEST on the instrument you have NOW.
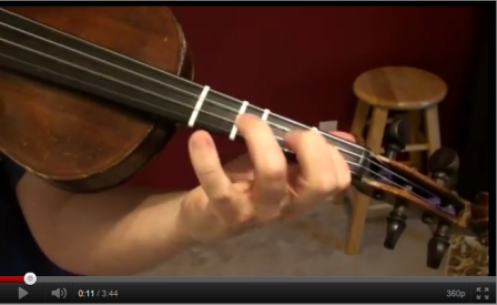
Bow Weight
Bow weight is challenging because the bow at the tip is very light, and the bow at the frog can be very heavy because your whole hand and arm are right there. That is why 98 percent of crunches happen at the frog. Ideally, you want to distribute the bow weight evenly, so it is consistent from frog to tip. This involves finesse at the frog to deal wit the extra weight, and strong “pronation” of the bow hand to lend weight all the way out to the tip.
Bow Benders (for bow weight control)
The following is an exercise to develop the muscles and technique of pronation:
Place the bow on any string at the TIP. Make sure your bow is STRAIGHT (parallel to the bridge), and make sure your bow hand remains PERFECT. (You must be careful not to let exercises like this start bad habits like caving your bow thumb in.) Bend your bow by pressing the tip against the string. Pronate your bow hand forcefully enough to bend the bow until the stick actually touches the horsehair. Most of the work will be performed by your index finger opposing your thumb. You will also feel some work being done by your forearm muscles. Do this repeatedly, but slowly to monitor your bow hand and muscle sensation. Again, don’t let your bow thumb cave in.
To avoid muscle injury or pain, start off easy. You can make this exercise easier three ways. 1) Put the bow on the E string. Trust me—it’s easier. 2) Don’t put the bow all the way out to the tip….put it 6 inches or so from the tip. 3) Don’t tighten the bow fully, leave it somewhat loose. As you get stronger and better at this exercise, try doing it on other strings, and tighten the bow more. The hardest element is putting the bow on the string way out at the EXTREME tip. That takes some serious pronation!
Bow Speed
This is the simplest of the 3 ingredients to understand and control. In fact, bow speed is self-explanatory—it refers to how fast or how slowly your bow travels across the string. And as a general rule, Bow Speed is closely linked to Bow Weight. You will usually inversely adjust these ingredients. More bow speed needs less bow weight, Less Bow Speed needs More bow weight, generally.
Bow Placement
This ingredient is somewhat more independent from the other two. Bow placement is in reference to how close or how far from the bridge your bow is placed while you play. Many Suzuki teachers refer to this as the “Kreisler Highway” named after the famous violinist, Fritz Kreisler. I like this analogy, but I like to break it into a 5-lane highway, so if my student makes a crunch….I simply say, “What lane are you in?” , and they know exactly how to fix it.
When you play with the bow right next to the bridge, you will tend to get a scratchy sound unless you use lots of bow weight, and a very slow bow. If you play with the bow far from the bridge, you can get a beautiful, soft, wispy sound….until you try to play louder, and then all you get is CRUNCH. This happens because when you play loud, we all know you must press harder with the bow…i.e. BOW WEIGHT! You just changed an ingredient in your tone pie without adjusting the other ingredient–namely the bow placement!
In case it’s not obvious, volume and dynamics are not additional ingredients in the tone pie. Volume and dynamics are achieved by manipulating the tone pie itself.
Exercises for Great Tone
I like to create a “default setting” for my students: Middle lane of the Kreisler Highway, medium bow speed, and medium but not wimpy bow weight. I find that this default works 85 percent of the time. Here are some basic examples of when the “default setting” of your tone pie needs to be adjusted:
I) A very long note, played loud: (Try with a Loud Twinkle Theme)
–Loud requires lots of Bow Weight
–Lots of Bow Weight requires less Bow Speed
–Less Bow Speed and more Bow Weight requires Bow Placement close to the bridge.
II) A very long note, played softly: (Try with a Soft Twinkle Theme)
–Soft requires less Bow Weight
–Less Bow Weight needs a little more Bow Speed
–Light, fast bow needs Bow Placement further from the bridge
III) A staccato stroke or many staccato strokes: (Try with Twinkle Variation B)
–Staccato is a fast bow stroke—lots of Bow Speed
–Staccato requires Bow Weight to GRAB the string
Normally, we don’t combine Fast bow with Heavy bow, so our last ingredient will make or break us—Bow Placement is critical. Choose the middle lane of the Kreisler Highway. If your bow is really fast, go a little further from the bridge. If your bow is not so fast, try going a little closer to the bridge.
I should mention that if your bow is not straight (parallel to the bridge), you will NOT have good tone. This is not a Tone Pie issue. It is a technique issue.
IV) A strong, clear detache’ stroke and combination strokes (Try with Twinkle Variation A and D)
–Medium Bow Weight
–Medium Bow Speed
–Middle Lane of Kreisler Highway
This one is your default setting! You will use this 90 percent of the time.
One final word: It’s important not to be wimpy with your bow weight in a detache’ stroke. Don’t be afraid of getting a crunch here and there! REMEMBER: Your best, biggest sound is one hair away from a great big crunch! You have to take risks! You will never know how far you can push until you push too far! I heard Perlman crunch in concert once. You have to push the limits to achieve your best sound! LIVE DANGEROUSLY!
Thanks for this! I’m 18 years old and just starting 🙁 yikes a lot of catching up to do! Any advice on how to make sure your bowing straight? Also how much progress have I missed out on by starting so late? I feel like I’ll never be able to catch up or work my way up to be as good as violinists like Taylor Davis because I’ve missed out on that “crucial learning period” of my childhood that everyone seems to be talking about. It’s a force that pushes me harder and discourages me all at once! What suggestions do you have to older beginner students?
Hi Elizabeth
I replied to your email, but I”ll give a brief reply here as well. DO NOT listen to people who say if you don’t start as a child then you missed your chance for “crucial learning” etc. For every advantage a child has in learning, adults have a different advantage that counterbalances it. (attention span, discipline, attention to detail, desire, etc.)
So, do not doubt for one second that you can achieve your dreams! Make the commitment, and be consistent in your practice.
Get a teacher, or sign up for my lessons. Challenge yourself with big goals like joining an orchestra in 2 years, or playing your dream song in 2 years, etc.
Good luck! We all hope to see you in the studio!
Hi Elizabeth (Leanna)
I replied to you privately, but here it is again….
First of all, congrats on such a great start on violin!
Don’t think for one second that you started too late to do anything significant…..you are still so young, you can achieve your dream of being an advanced fiddler!
As far as your question about are you moving too fast….that’s hard to say. My initial thought was YES, the teacher needs to be teaching you foundational skills along with all those tunes. Most fiddle teachers focus on learning tunes, and they don’t spend any time on technique. I am just the opposite, and I have to be careful to make sure I allow my students to MAKE MUSIC in every lesson….because no one wants to just sit and work on technique all day. It’s a balancing act.
It sounds like you have motivation, discipline, and talent! So, with those 3 things, you will go far.
I would suggest that you look into my basic violin class. MANY students who have private teachers take my basic class, to supplement their private lessons. I have never had a conflict where a private teacher was teaching something just the opposite of what my lessons said…..and most people are really happy because they discover that my online lessons cover things that they are missing in their private lessons. (but private lessons can give you that personal element that is impossible to capture in online lessons)
Here is a link where you can check it out, no obligation:
http://www.RedDesertViolin.com/onlinelessons
It follows Suzuki Book 1, because I am a firm believer in that method…..I find that Suzuki is THE SHORTEST path to proficiency on the violin, regardless of what style you eventually choose.
Let me know if you have any other questions!
Welcome to the violin world!
The pointers are very helpful. at this stage I have been using a violin for about ten years playing some trad music badly. just started to play in public but need more professional approach.
REALLY WANT TO ENJOY IT, and do, but want to be a better musician. Trad music is taught without the classical formation that can add so much more to playing and still remain true to the trad sound. Would like to play Gounod’s Ave Maria, for example,
best regards Gar, Dublin ,Ireland.
Hi Gar
It’s always SO cool to hear from someone in Ireland! 🙂 Some day, I WILL visit!
Yes….I hear what you are saying about the classical fundamentals that can assist traditional players SO MUCH! And it does not have to detract from that “authentic” sound. It just makes everything easier!
A few of the most common fundamentals that are missed by traditional players are:
Playing with a straight bow
String Crossing technique
Mastery over the sounding points
Tone production
Intonation
Actually, that’s a pretty short list. If traditional players would learn those 5 basic things, their worlds would be opened up!
Now, to be fair, let’s name a few things that classical players miss out on that traditional players totally have in the bag:
Playing by ear is often an advantage enjoyed by trad players, which classical players struggle with. (unless they did the Suzuki method!)
Improvisation or versatility (classical players tend to get locked into ONE RIGHT VERSION…and anything else screws them up)
Syncopation, dancey rhythms, or folky nuances and phrasing is hard for classical musicians to really capture…unless the nuance is the same as classical music, it’s very hard to change nuance….little things like always starting Beat 1 on a down bow, needing to always alternate down bows and up bows, needing the strong beats to be 1 and 3, directing our phrases to be loudest toward beat 1 or beat 3.
So, every group has their advantages! We could all learn from each other!
Ave Maria is a gorgeous piece to work on vibrato and tone! Some other favorites of mine are Meditation by Massenet, the Air in G by Bach, any waltzes, oh….you must know the Neil Gow Lament for his wife? It’s a Scottish tune….omg….that one is so beautiful, and great for working on the G string!
WONDERFULLY INFORMATIVE! THANKS!
Excellent and very helpful